Overview
Canary is a generic push message delivery platform for mobile and wearable devices. Instead of relying on third party message delivery systems such as GCM (Google Cloud Messaging) or the Apple Push Notification service, you can push messages directly from canary to your devices, eliminating the extra dependency on external servers and services.
Since Canary is designed to be a standalone platform, it can be deployed in an intranet environment without an active Internet connection. This makes Canary extremely flexible and suitable for corporate environments where it is essential for data to stay within the organization. All of the data that flows through the Canary system is logged in a local NoSQL database, allowing easy generation of reports and as well providing a proper audit trail.
In addition to being a push message delivery system, Canary is also able to read data and start additional services on the devices, allowing Canary to have the ability to perform functions such as location-based messaging, and device monitoring.
Device Dashboard
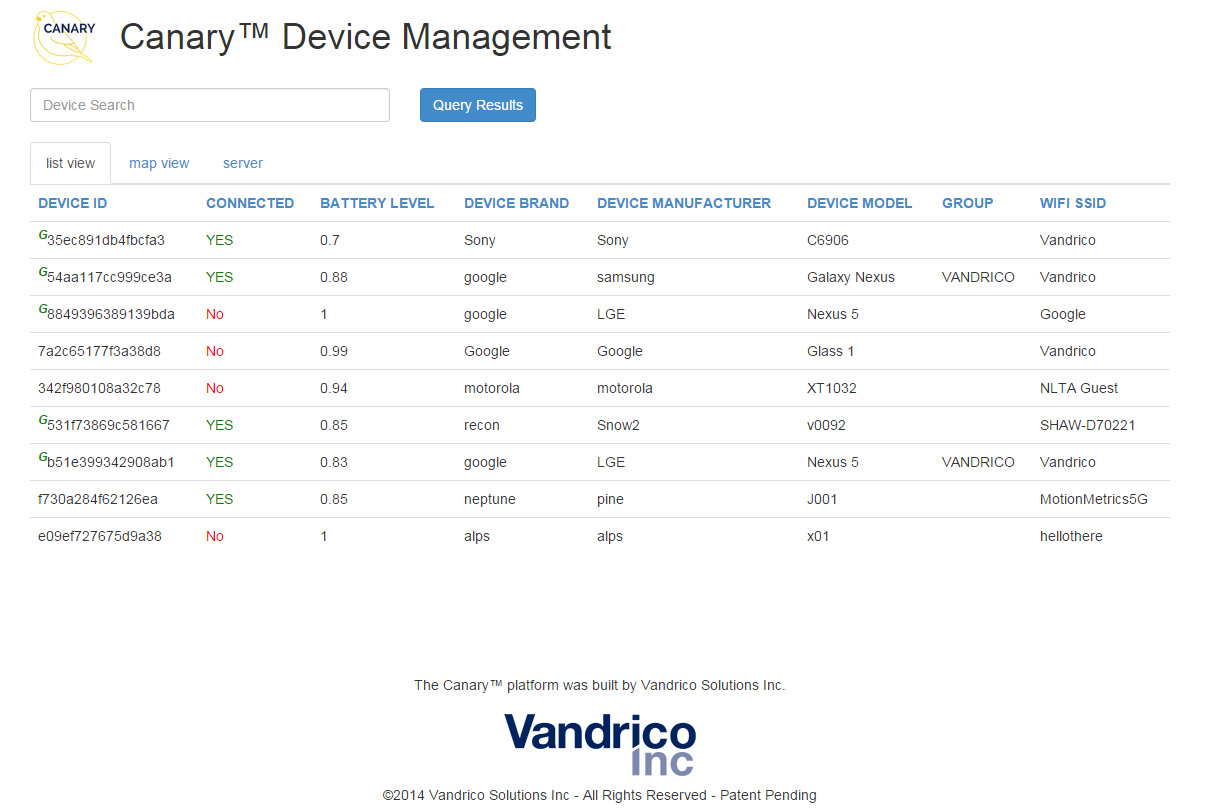
The Canary server software comes with a dashboard which gives you an overview of all devices currently connected to your Canary server. To access the Canary Dashboard please use an HTML5 compatible web browser and visit your canary server on port 8080.
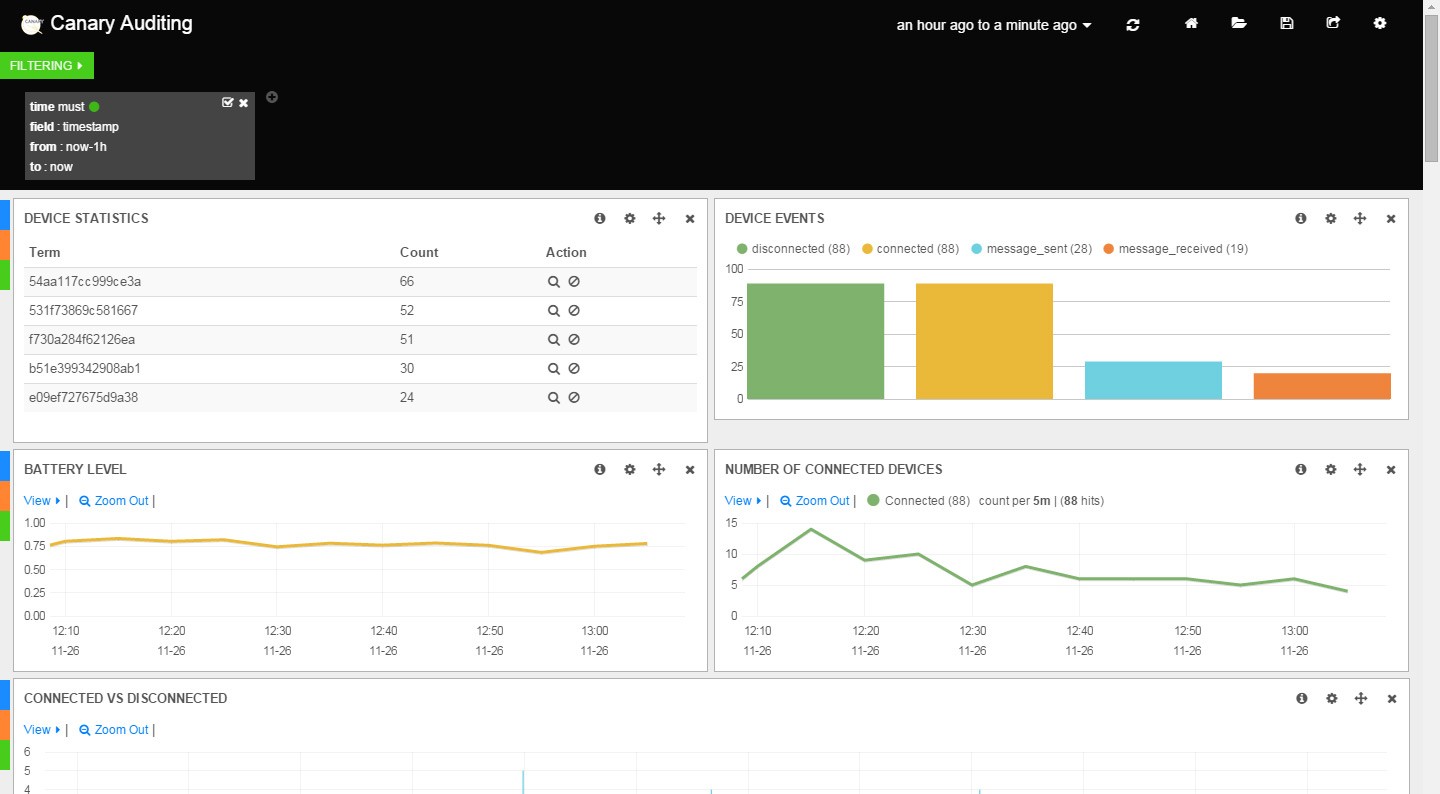
Auditing Dashboard
The auditing dashboard is the user interface for Canary's NoSQL back-end database. From the auditing dashboard you can access logs of all system events on your Canary server, from device battery life to connection status, messages sent, received and acknowledged. Visit your Canary server on port 8081 to access the auditing and analytics dashboard.
Server Setup
To set up your Canary server, follow these instructions:
- Download, install, and run the Canary server binary. The server is written using Java and is being tested on Redhat Linux and Windows (must have JRE 1.7 or above). There are two binary packages for you to choose:
- An exe file, suitable for Windows deployment.
- A RPM file for Redhat Linux systems.
- Once the server is running, any devices on the same network will try to discover the Canary server automatically. Each device running the Canary client performs a LAN based scan on a regular interval and will connect to all active Canary servers on the same network. The canary server has a RESTful API, so you can test the server and connections:
- https://
:8001/devices - this will list all connected devices. - https://
:8001/version - this will display the version of canary server that youa re running. - https://
- https://
- Open TCP ports 5678 and 8001 and UDP port 5353 on all Canary servers and any networking equipment.
- For full dashboard functionalities, you also need to open ports 7999 and 8000.
- To access the analytics console, you must open port 8001
- Allow zero configuration service to discovery any networking equipment.
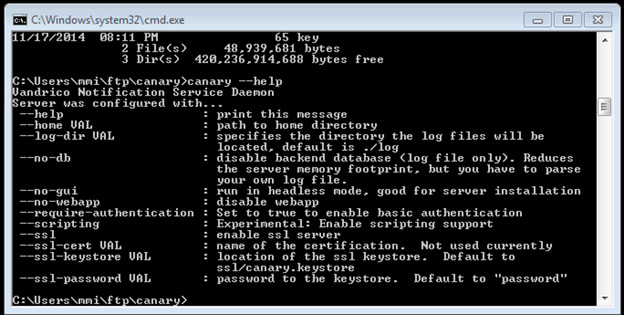
- The canary server can be configured from the console. To see all the configuration options, use the
—helpcommand line argument
Client Setup
Currently Canary fully-supports Android, and by extension Android Wear and Tizen devices. We also work with some custom devices and are currently developing our iOS support. If you are interested in support for a custom device or iOS, please contact us at support@vandrico.com.
To load the Canary client on to your Andriod powered wearable or mobile device, follow the instructions below.
METHOD 1: PLAY STORE
- If your device has google playstore access, simply install the canary app from the google play store.
- If the link above doesn't work, search for “Vandrico Canary” on the Google Playstore
METHOD 2: FILE MANAGER
- Enable unverified app downloads.
- Plug in the device into a computer.
- Drag the apk file into any folder on the device.
- Download any file manager (e.g. File Manager by Cheetah Mobile).
- Navigate to your apk file in the file manager and open it.
METHOD 2: ADB
- Get the most up to date official drivers for your device. These usually can be found through the manufacturer’s website or by contacting them directly.
- Put device into developer mode.
- Run command prompt.
- Type
adb install [location of APK]
- If you are reinstalling,
adb install –r [location of APK]
- If you have multiple devices attached
adb –s [serial number] install [location of APK]
- You can find the device serial number by “adb devices”.
Application Dashboard
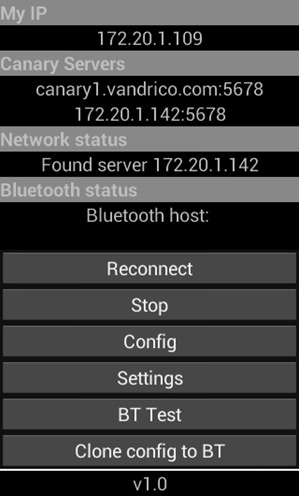
My IP
The IP address of the device
Canary Servers
The servers that are visible to the device
Network Status
The connection status to the server
Bluetooth Status
(see below)*
Reconnect
Reconnect to the server
Stop
Stop the connection to the server
Config
Configure Canary
Settings
Enter the device settings menu
*BT Test, Clone config to BT, and Bluetooth Status are functionalities that are specific to extending bluetooth devices (such as Google Glass).
Client Settings Configuration
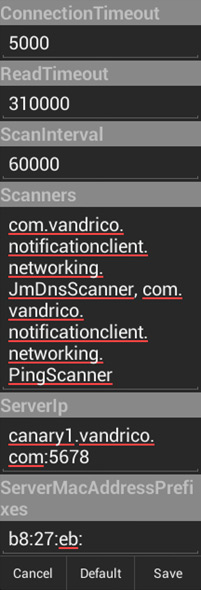
Connection Timeout
How long before retrying a connection
Read Timeout
How long to hold a connection
Scan Interval
How frequently to scan for Canary servers
Scanners
Type of scanners we are using
Server IP
IP address and port of the default Canary server to connect to. You will want to point it to the IP of your locally installed canary server. Be sure to include the :5678 suffix
Server Mac Address Prefixes
Canary server MAC address prefix.
API Usage
All of the Canary Platform's functionality is exposed through its RESTful API. Listed below are all of the currently supported API endpoints.
Note: For all endpoints that include the GET parameter {query}, you can pass any attribute value of the device (such as device_id, group, manufacturer and custom attributes that you assign). If more than one device has an attribute with the query value then multiple devices will be included.
List all Registered Devices
Lists all registered devices on this canary server.
GET /devices/
Expected Response
HTTP/1.1 2000 OK
Content-Type: application/json; charset=utf-8
Canary-Devices: 1
{
    "response": "OK",
    "devices": [
        {
            "device-model": "Glass 1",
            "wifi-ssid": "C4502A",
            "server-ip": "canary3z8Eh27aA8p.vandrico.com:5678",
            "location": [
                -125.0841455,
                49.3545622
            ],
            "connected": true,
            "device-manufacturer": "Google",
            "device-brand": "Google",
            "device-serialnumber": "b51e319342928ab1",
            "device-id": "b51e319342928ab1",
            "battery-level": 0.93,
           "wifi-bssid": "79:cd:8e:c4:c0:78"
        }
]
Obtain a Device's GPS
Great for displaying a device or groups of devices on a map.
Endpoint:
POST /devices/{query}/gps
Post Body:
{"payload":{}}
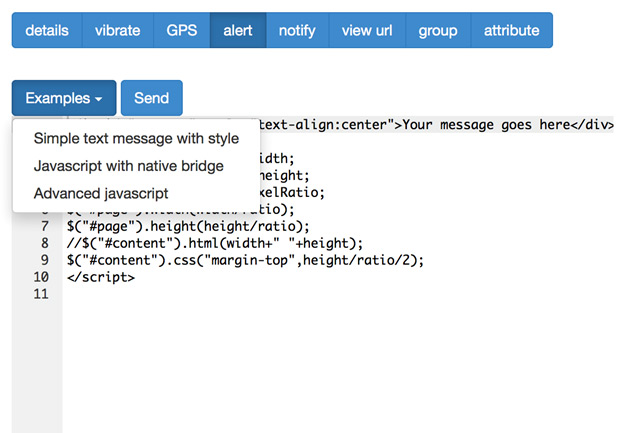
Alert a Device
The payload of the alert endpoint understands HTML and Javascript. If you use the canary dashboard, you can see examples of how to create your own alert with specific style and functionalities. Using Javascript, you can have access to some of the native functions of the device. At the time this documentation was written, the following custom javascript functions are implemented:
vibrate( millisecond ) – virbate the devices for a number of millisecond
send("string to send to the canary server") – sends string back to the canary server. You can use the analytics dashboard to see the message.
dismiss() – close the alert window
Endpoint
POST /devices/{query}/alert
Post Body
{"payload":"Hello World"}
Notify a Device
The notify endpoint works like an alert, except it has an optional img attribute for easily displaying images. This endpoint is optimized for notifying tethered devices (such as Android Wear watches or Google Glass).
Endpoint
POST /devices/{query}/notify
Post Body
{"payload":{"img":"https://i.imgur.com/bFhZpCG.png?1","action":"yes","message":"hello world?"}}
Open URL on a Device
View url points the default browser on the device to a specified URL location. Note: if your device does not have a lock screen, this command will wake up the device and show the URL.
Endpoint
POST /devices/{query}/view
Post Body
{"payload":"https://vandrico.com"}
Grouping Devices
Grouping assigns the device to a specific group, which can be useful when organizing devices. Group names can be used later for other queries to send alerts or notifications to multiple devices.
Endpoint
POST /attribute/{device_id}
Post Body
{"group":"group-name"}
Testing the API through the Canary Dashboard
From the Canary dashboard you can quickly test API endpoints and develop script payloads. Simply click on a device or query all devices then follow the options from the pop-up modal.